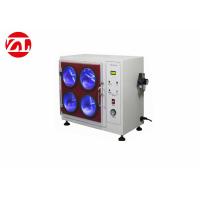
XHRS-150 Digital Plastic Rockwell Hardness Tester
The XHRS-150 digital Rockwell hardness tester adopts a novel large-screen LCD display, and the operation panel
adopts a menu structure. Its main functions are:
1 Selection of Rockwell hardness scale,
2 Choice of plastic Rockwell scales,
3 The hardness conversion between various hardnesses,
4 Hardness test result printout,
5 With automatic storage function and RS-232 super terminal
settings, the machine has good reliability, the working process is
more user-friendly, the operation is simple, and the test results
are directly displayed digitally.
Scope of application:
Hard plastic, hard rubber, aluminum, tin, copper, mild steel,
synthetic resin and friction materials, etc.
Technical parameters:
| ( Plastics Rockwell Scales) | HRE, HRL, HRC, HRM, HRR |
| (Initial Testing Force) | 10Kg (98.07N) |
| (All Testing Force) | 60Kg (588N), 100Kg (980N), 150Kg (1471N) |
| (Indication of Hardness Value) | Dial |
| (Duration Time) | 2 ~ 60S |
| Max. Height of Specimen | 170mm |
| (Overall Dimension) | 520X240X700MM ( L*W*H) |
| (Net Weight) | 80 Kg |
| ( Power Supply) | AC220V + 5%, 50~60 Hz |
| (Carried Standard) | GB7407, JJG884 |
People also like ask
1. How do you perform a hardness test?
A hardness test is typically performed by pressing a specifically
dimensioned and loaded object (indenter) into the surface of the
material you are testing. The hardness is determined by measuring
the depth of indenter penetration or by measuring the size of the
impression left by an indenter.
2. How do I find my Rockwell hardness number?
The Rockwell hardness number is calculated from the depth of
permanent deformation of the indenter into the sample, i.e. the
difference in indenter position before and after application of the
major load. The minor and major loads can be applied using dead
weights or springs.
3. How ofen should a durometer be calibrated?
one year
Unless otherwise requested the calibration interval on your
durometer will be one year. Several factors should be taken into
consideration such as: the required accuracy vs. the instruments
accuracy, the impact an out of tolerance reading will have on the
process, and the performance history.
4. Is code for Rockwell hardness test?
ISO 6508-1:2015 specifies the method for Rockwell regular and
Rockwell superficial hardness tests (scales and applicable range of
application according to Table 1) for metallic materials and is
applicable to stationary and portable hardness testing machines.
5. How do you use a manual Rookwell hardness tester?
(1) Wipe the top surface of the screw and the upper and lower end
surfaces of the worktable, and place the worktable on the screw
table;
(2) Clean the support surface of the specimen and place it on the
workbench, rotate the handwheel to slowly raise the workbench and
push up the indenter until the small pointer points to the red dot
and the big pointer rotates 3 circles vertically upwards;
(3) Rotate the indicator shell to make the long engraved line
between C and B align with the big pointer;
(4) Pull the loading handle, apply the main test force, and the
large pointer of the indicator rotates counterclockwise;
(5) When the rotation of the indicator needle stops, the unloading
handle can be pushed back to remove the main test force;
(6) Reading from the corresponding scale on the indicator;
(7) Turn the handwheel to lower the test piece, then move the test
piece, and carry out a new test according to the above steps
(2)-(6);
(8) After the test, cover the machine with a dust cover.


